
How to install Google Optimize and do AB testing Shopify
Google Optimize allows you to build and run A/B tests and personalization experiments. Optimize is a tool that helps increase conversion rates and improve user satisfaction. It works similarly to other tools such as Optimizely, VWO Unbounce, Convert and Convert. Optimize is unique because it offers all of these services free of charge. Google Optimize and Shopify integration are perfect for what you do. AB testing Shopify is important and can increase your conversion rate.
Shopify allows producers to sell their products online through an e-commerce platform called Shopify. You probably have a Shopify Account if you’re here. Shopify allows A/B testing. This means that it can integrate with Google Optimize and Optimize 360.
This tutorial will show you how to install Google Optimize for Shopify.
Multiple components of Shopify can be tested. You can test for:
- A/B testing of a recommendation engine.
- Funnel testing for a site redesign.
- Multivariate testing is used to determine the optimal combination of elements that will increase conversion rate.
- Split URL testing is used to capture the first impression of a new product on an audience.
- Personalization allows you to target users more effectively.
These are only a few examples. There are many more.
Before you can follow the Google Optimize/Shopify integration steps, it is necessary that you have created and set-up Google Analytics, Google Tag Manager and Google Optimize accounts.
Once you have these items, you can follow the steps to install Google Optimize in your Shopify store. Then you can start with experimentation yourself or ask your digital marketing agency to take care of it.
How to install Google Optimize on Shopify
Install Google Optimize first through the Shopify admin.
Step 1: Install Shopify’s analytics code
Your Google Analytics Tracking ID can be added to your Shopify store. Under the Sales channel option, go to Online Store, and then click on Preferences. In the dialogue box, enter your tracking ID.

Step 2: After completing the required replacements, paste the following code.
In the Additional Google Analytics JavaScript area, add your Google Tag Manager container. The code is available below. Simply replace the tracking IDs and container with your own.
// Google Tag Manager (function(w,d,s,l,i){w[l]=w[l]||[];w[l].push({‘gtm.start’: new Date().getTime(),event:’gtm.js’});var f=d.getElementsByTagName(s)[0], j=d.createElement(s),dl=l!=’dataLayer’?’&l=’+l:”;j.async=true;j.src= ‘https://www.googletagmanager.com/gtm.js?id=’+i+dl;f.parentNode.insertBefore(j,f); })(window,document,’script’,’dataLayer’,’GTM_CONTAINER_ID‘); ga(‘require’,’GOOGLE_OPTIMIZE_CONTAINER_ID‘); ga(‘create’, ‘GOOGLE_ANALYTICS_ACCOUNT_ID‘, ‘auto’, {allowLinker: true}); //
It’s as simple as that:
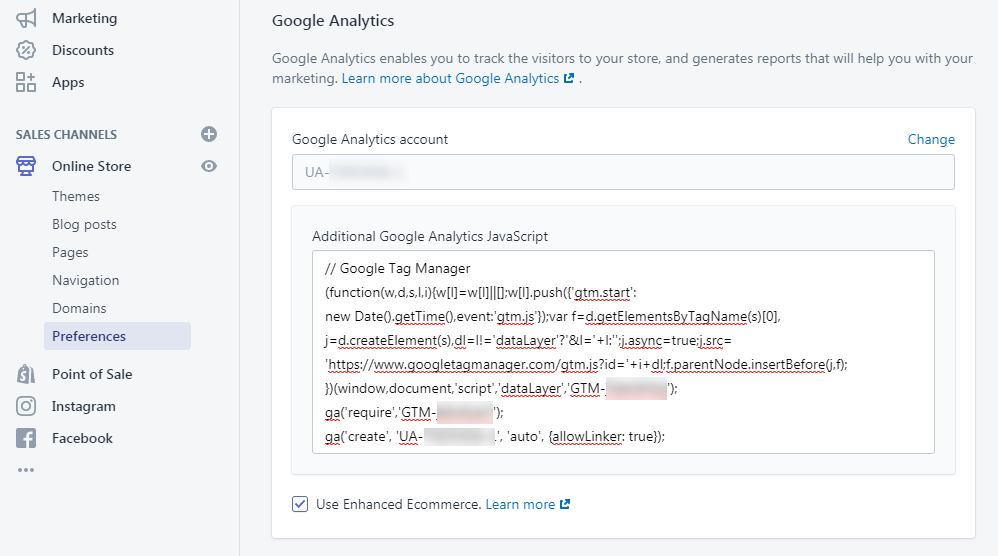
Step 3: Add the Google Optimize anti-flicker code snippet
Go to Online Store and choose Themes to add this piece. Click on the Actions menu and choose Edit code.
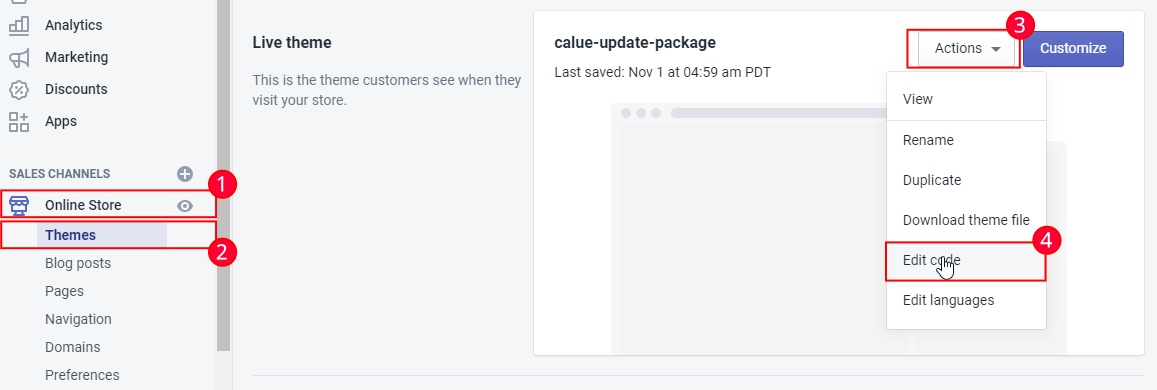
Step 4: Add the Google Optimize antiflicker snippet to the theme.liquid file
This step, even though it is not necessary for the test you wish to run is important to avoid page flickers when running tests on your website. This will block content from being displayed on the page until the variant is ready so that users don’t know the A/B test has begun.
If you are using Shopify Plus, insert this snippet into your head. Tag in theme.liquid or checkout.liquid
// <!– Anti-flicker snippet (recommended) –> <style>.async-hide { opacity: 0 !important} </style> <script>(function(a,s,y,n,c,h,i,d,e){s.className+=’ ‘+y;h.start=1*new Date; h.end=i=function(){s.className=s.className.replace(RegExp(‘ ?’+y),”)}; (a[n]=a[n]||[]).hide=h;setTimeout(function(){i();h.end=null},c);h.timeout=c; })(window,document.documentElement,’async-hide’,’dataLayer’,4000, {‘GTM_CONTAINER_ID‘:true});</script> //
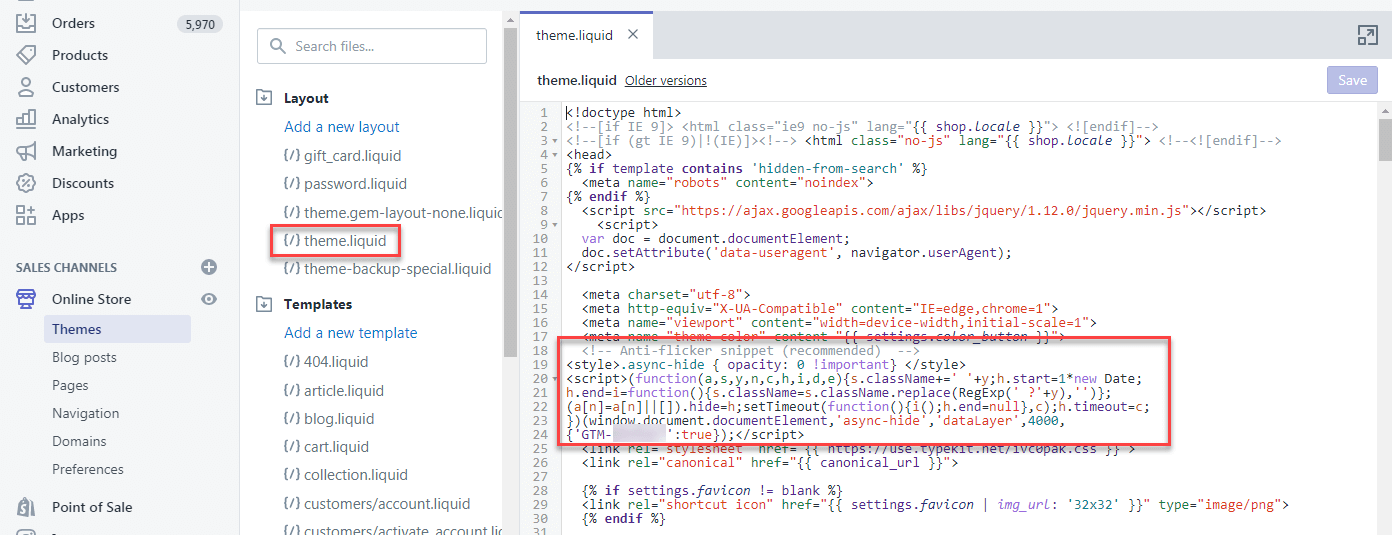
This can also be used in your GTM:
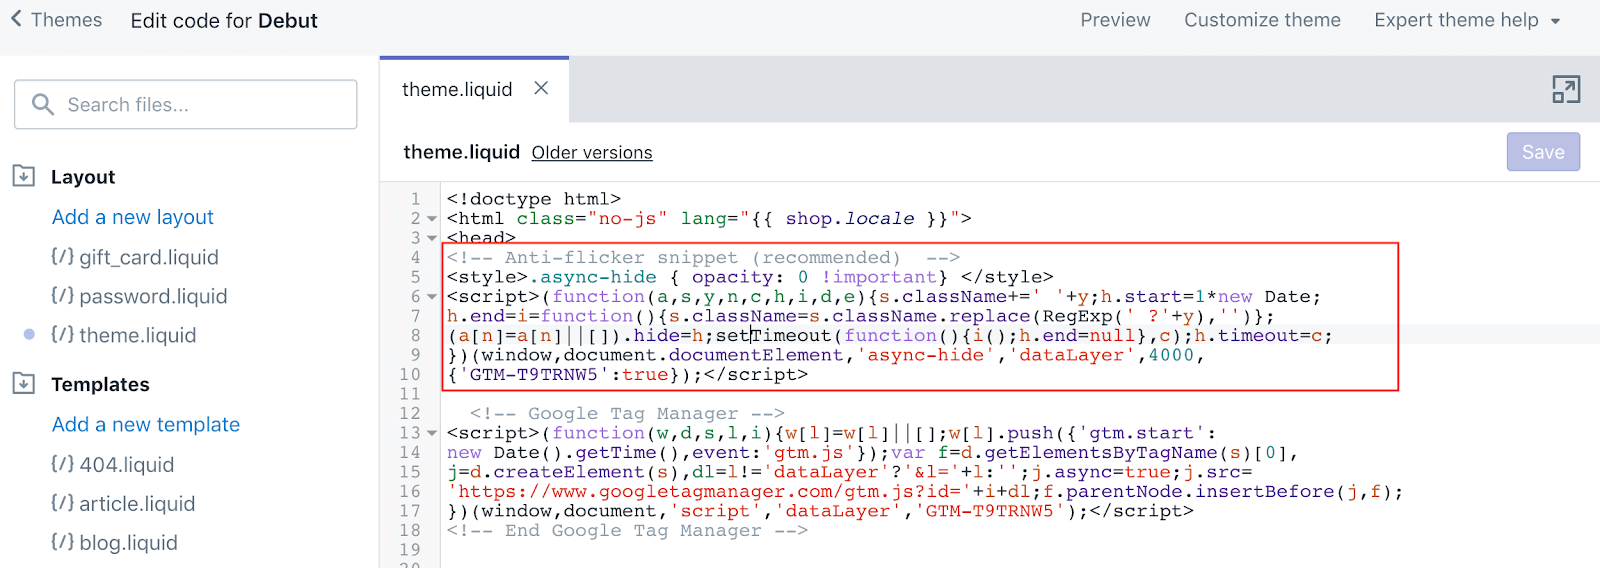
This is to protect against any negative effects from FOOC.
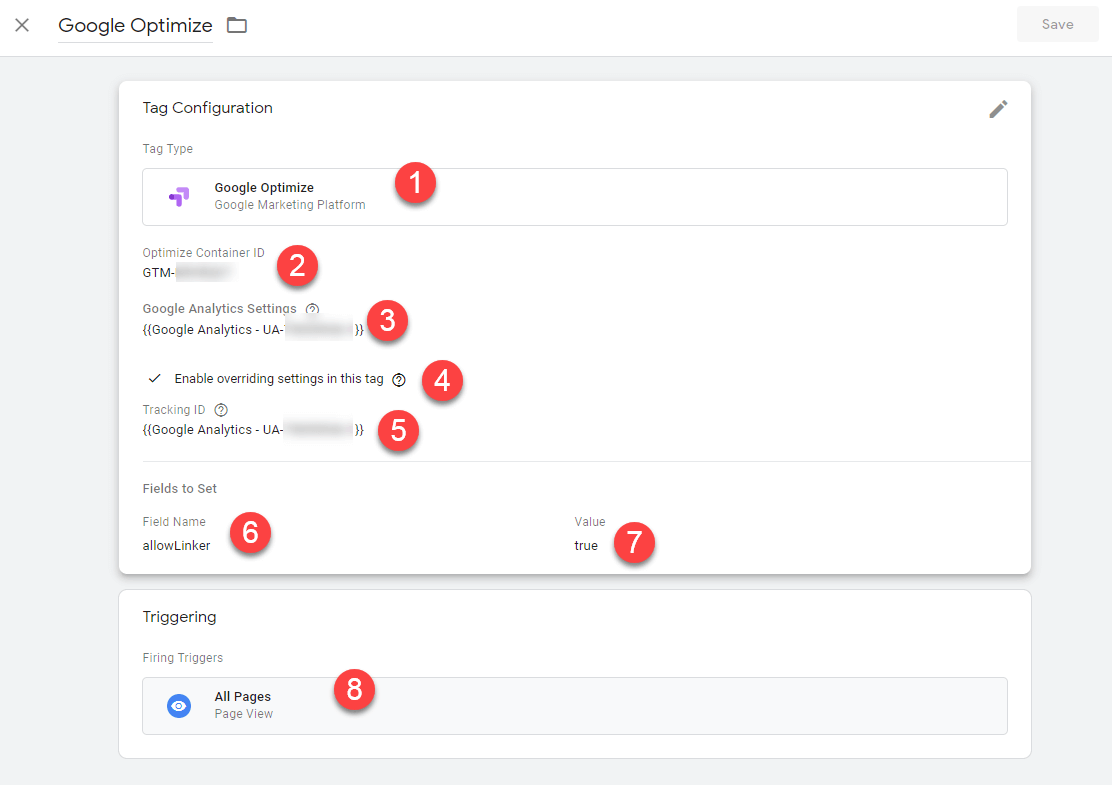
Step 5: Create Google Optimize in Google Tag Manager.
- Make a “New” tag.
- Select “Google Optimize”.
- Paste the Google Optimize Container ID in the “Optimize Container ID” box.
- Choose your “Google Analytics Setting” in the drop-down menu.
- Check the box that says “Enable overriding settings for this tag”.
- Add the Google Analytics Tracking ID variable.
- Select “More Options”.
- Enter “allowLinker” under “Fields To Set” and change the “Value” to “true”ю
- Set the trigger to “All Pages”.
When you are done, it should look this:
After all of this is done, save your Container and publish it.
You can now run a diagnostic test with Google Optimize on Shopify. As a confirmation, you will receive this message from Shopify:

Conclusion
Google Optimize for Shopify makes testing easy. However, for some experiments, you will need to copy the test snippet and paste it into Shopify. The tools do not manage the changes, so this could cause additional problems.
UAATEAM helps our clients to overcome these issues and ensure that their tests run smoothly. Contact us if you are already struggling with these issues. We will provide additional support to help you get through Shopify testing difficulties. To get in touch, please fill out the form.


