
COMPLETE WEBSITE SEO AUDIT USING THE SCREAMING FROG SEO AUDIT TOOL
Technical SEO audit of your website is one of the most important stages in SEO promotion of a website, which consists in finding errors on the resource and eliminating them.
After all, all the mistakes made in the website negatively affect its indexing and ranking in the Top-list of websites. Screaming Frog is an indispensable website audit software for every webmaster and SEO specialist. It is not intended for large websites and up to 50,000 URLs are free.

SCREAMING FROG GUIDE – BASIC FUNCTIONALITY AND INTERFACE OF THE TOOL
The same as with any other website audit tool, let’s first get acquainted with its interface in this brief manual.
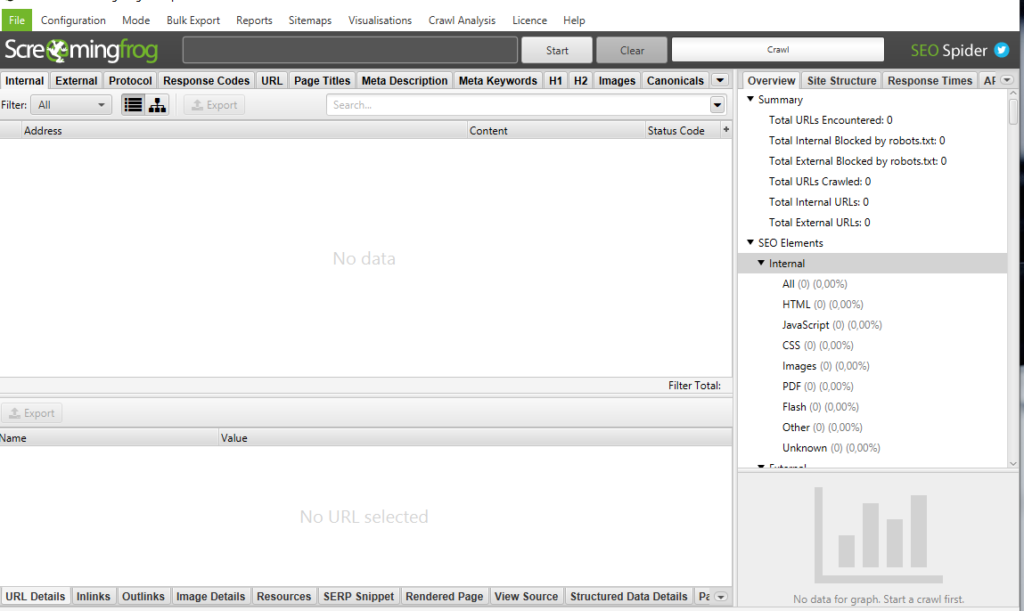
To start an SEO audit using Screaming Frog, enter the site URL in the address field and click the “Start” button.
If you have a small website, the site crawl and generation of a website audit report will only take a couple of minutes.
As a result, we see the main window with areas divided into 4 parts:
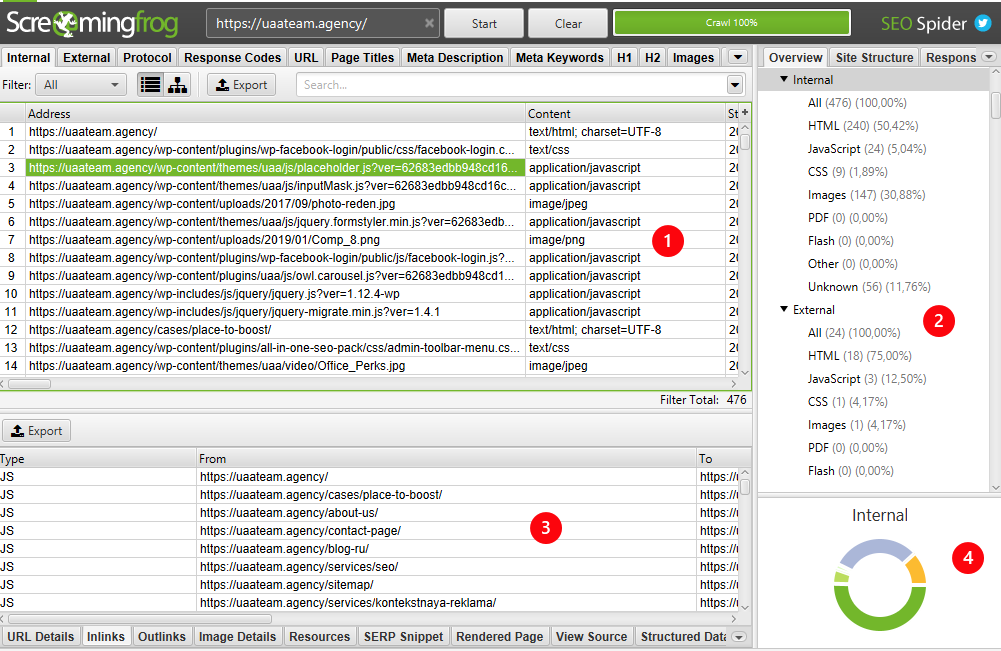
- window No. 1 shows a table with a list of all website pages;
- window No. 2 shows the number of website pages and their percentage ratio;
- window No. 3 shows detailed information about the specific page selected in window No. 1;
- window No. 4 shows the website structure in the form of a diagram.
Let’s take a closer look at the audit checklist and functionality of this website audit tool and how it will help us analyze our website.
INTERNAL TAB
The Internal tab displays all internal pages, so you can view the following information here:
1. INDEXING OF PAGES
In the Indexability column, you can see which pages are available for indexing and which are closed from the Screaming Frog crawler.
It is very important that the main pages of services, catalog and products are available for indexing, and if not, then you need to understand the reasons and fix this defect.
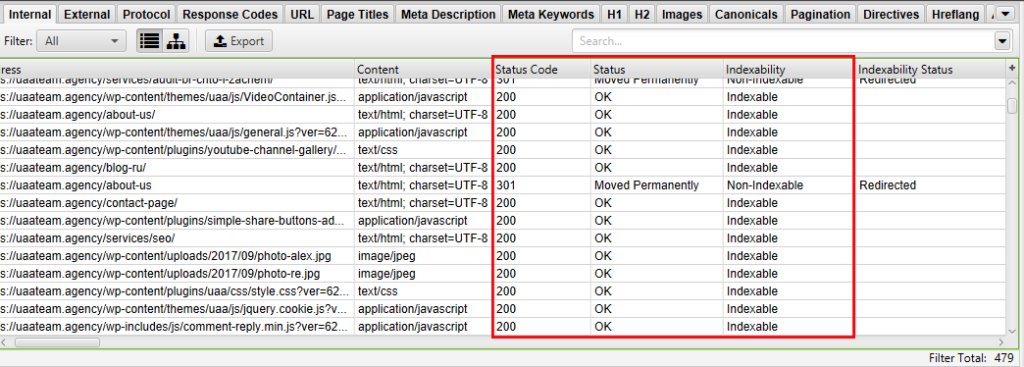
2. PAGE RESPONSE CODES AND THEIR ANALYSIS
All pages should give the correct codes of the server response: useful pages (such as product categories, products, pages of services) should give a response 200, non-existing pages – give a response 404 (see below, they were excluded from the linking of a website), pages the address of which had been changed forever — a response code 301, pages the address of which had been changed temporarily (such as equities) — a response code 302.
You can see all this data in the Status Code column (where information about the server response code is displayed), and in the next Status column – the server code decryption (for example, for code 200 — the OK status, etc.).
The ideal situation is when 100% of the website pages return the server a response code 200, but in practice this is difficult to achieve. This will also help increase the site loading speed.
For example, let’s analyze the page https://uaateam.agency/about-us. As we can see, it has the status code 301, which means that it has changed its address forever.
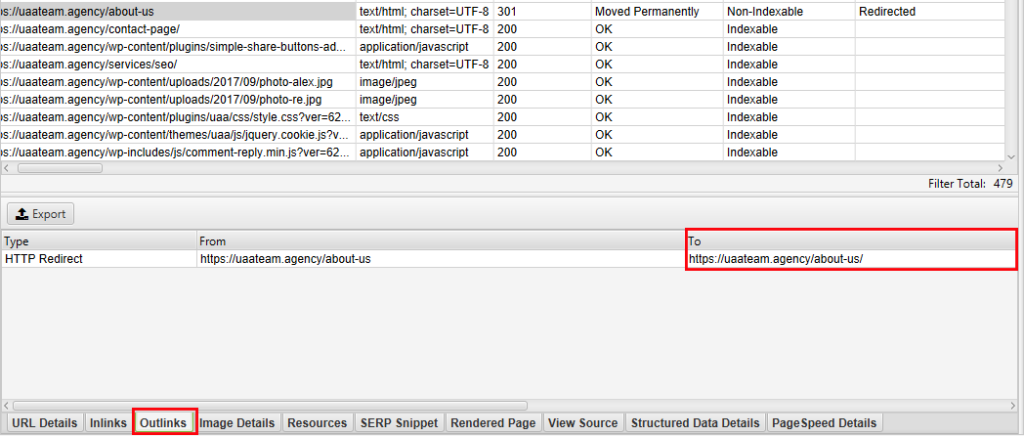
We need to find out where it redirects the user now, so that it does not turn out that it links to a non-existent or inappropriate page. To do this, click on the line we need, and more detailed information will be displayed in the lower window.
Select the Outlinks tab, which contains information about which URLs this page links to, and see that it leads to the same page, only with a slash.
You can also do this much more conveniently in the Response Code tab, which displays information about response codes for internal and external links.
By selecting a filter, you can view and analyze pages with response code 301, response code 404 and so on individually. This option is suitable for very large websites, and if you have a lot of pages not showing a response code 200.
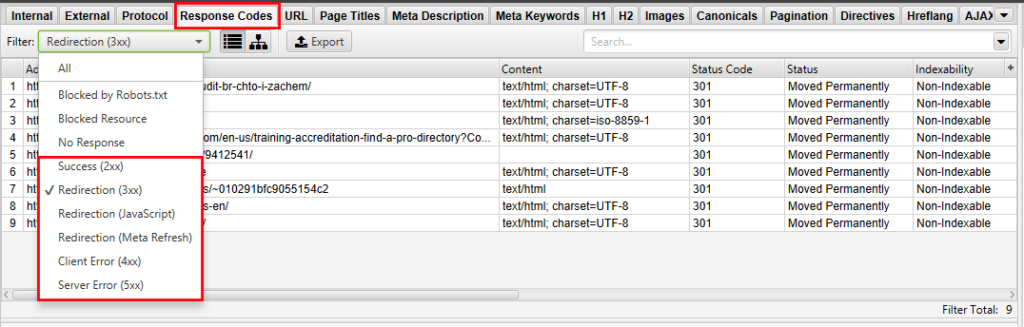
Attention! It is advisable to avoid having excessive redirects inside the website, as this significantly slows down the page loading speed and has a negative impact on the transfer of weight across pages.
This happens because when you open a specific page, you first spend time loading it, only then you are redirected to another page, which also takes some time, and only then the target page that is necessary for the user is loaded.
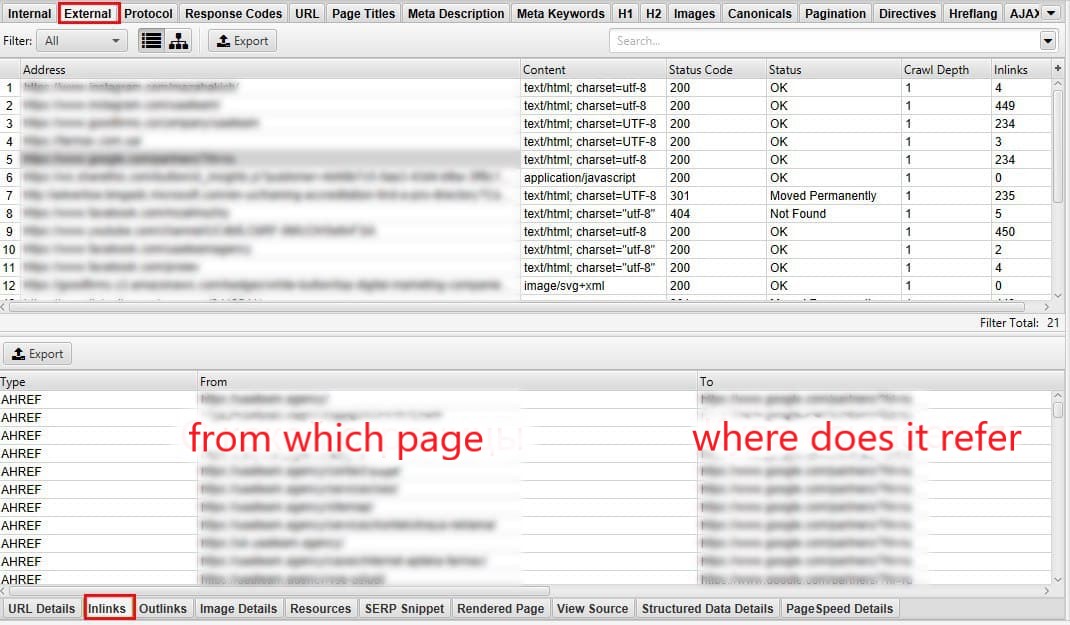
EXTERNAL TAB
Here you can see a list of all the resources that the analyzed website links to. For detailed information about which pages and websites your site is linked to, select the Inlinks tab, which is located at the bottom of the 3rd window.
3. CHECKING THE FILE ROBOTS.TXT
If a file robots.txt is added to the website, then it is necessary to check that there are no accidentally important pages that are closed from indexing.
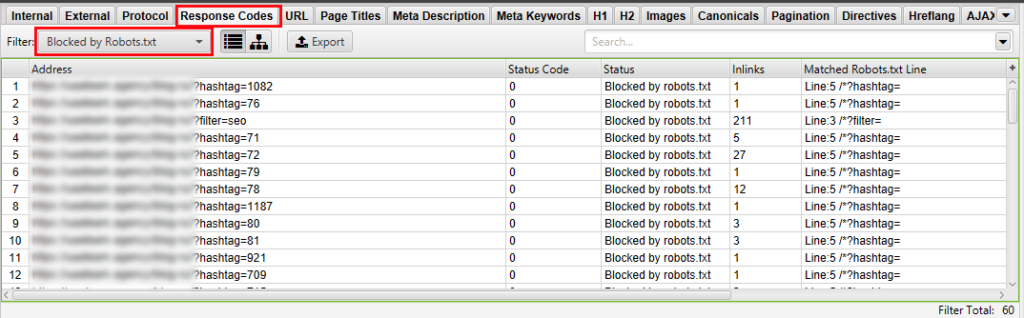
In our case, there are only appropriate pages closed in robots.txt from the Screaming Frog crawler (such as filters and grouping of pages in the blog).
If you find important pages here, you will need to correct the file robots.txt, i.e. open hidden pages for search robots.
4. TITLE AND DESCRIPTION TAGS
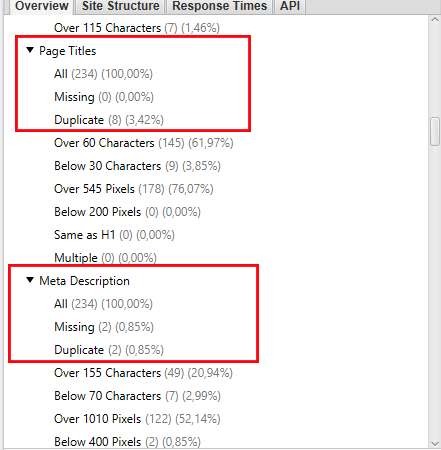
You need to make sure that a unique Title and Description are generated for all pages, and they contain keywords that the user can easily find and get to the desired page.
General information on the number of Title (Page Title) and Description, how many of them are empty on the pages (Missing) and how many duplicate (Duplicate), and in what percentage — you can see in window No. 2.
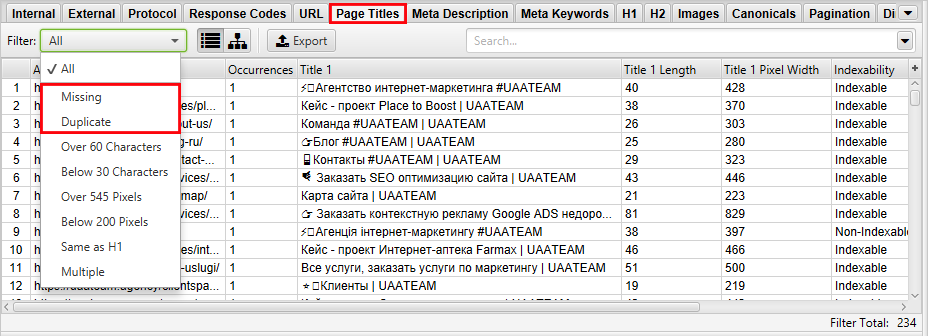
To see more details on which pages these important meta tags are missing, go back to the first window.
On the Page Titles (Description) tab, you can view snippets for each page and select the necessary filter (Missing and Duplicate) to view the pages for which you will need to add or rewrite these meta tags.
SEO specialists optimize Title and Description as part of website audit service and website promotion.
5. H1 TAG
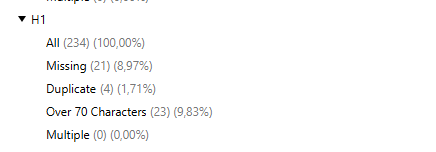
By analogy with the Title and Description meta tags, make sure that each page has a unique H1 tag that contains the name of the service, category, or product. This will help users better navigate the website, and Screaming Frog crawlers better rank it.
You also need to make sure that this tag is the only one on the page.
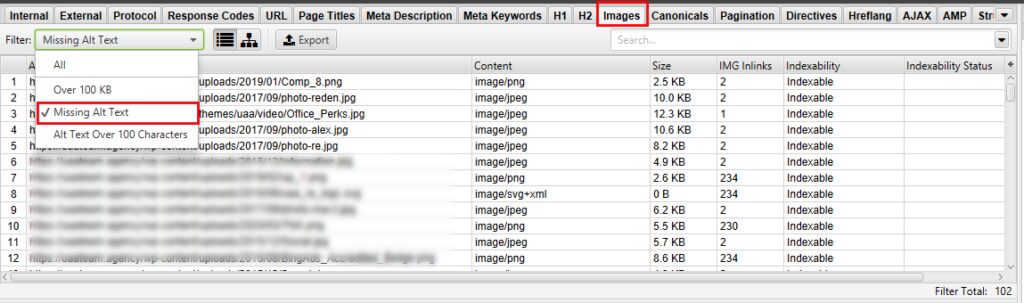
6. IMAGE OPTIMIZATION
Images is a tab that contains information about images.
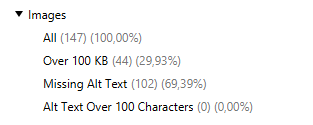
<p”>The website loading speed directly depends on the size of the images. Therefore, large images, namely more than 100 KB, slow it down very much. Therefore, we recommend that you do not use this type of images.</p”>
Also, you need to check that the images of services and products have Alt and Title filled in. This will help you rank better in the image search.
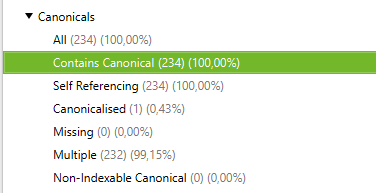
7. CHECKING THE REL=”CANONICAL” ATTRIBUTE
To deal with duplicate content, you must specify the Rel=”canonical” attribute between the <head></head> tags for all categories of products or services. Thanks to this, search robots will start to consider it a higher priority.
8. SITEMAP.XML WEBSITE MAP ANALYSIS
If the website has a file sitemap.xml, it is recommended to check whether pages with redirects 301, errors 404 and duplicates are included in it by mistake.
You can usually crawl a sitemap using Screaming Frog at:
[name of website]/sitemap.xml.
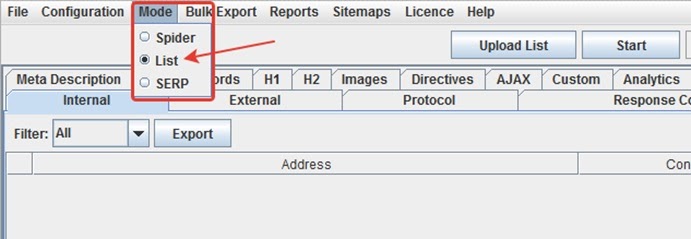
To carry out website auditing to identify SEO problems with the help of the tool, you need to change the Mode-List mode.
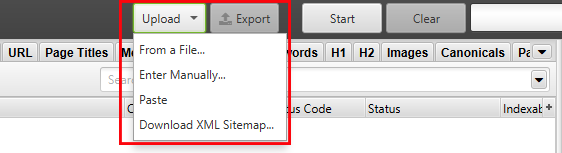
And then choose the download option:
CONCLUSION
In this article we have reviewed the SEO website technical audit fundamentals that need to be checked during the audit using Screaming Frog SEO Spider.
Such mini-audits are also recommended to be performed periodically to quickly identify and correct errors in the website.
If you have any difficulties or questions about conducting a SEO audit of your website, you can always contact our professional SEO specialists from UAATeam, who will be happy to help you.


 | UAATEAM")
