Guide: how to prepare google ads account audit
Google Ads account audit is a great way to increase the efficiency of your Google Ads account and reduce costs. An audit is an important step in determining what needs to be improved. Make an audit every few weeks (for a new client or account) or every month (to check a long-running account) to get the most benefits and results. Ask our Google Ads agency to check your account or do it by yourself.
The main purpose of the audit is to correctly identify problems that negatively affect your account.
When and why make an audit of Ads account?
- Ads performance has decreased: you want to improve your current ads account and use your time and money more rationally;
- You’ve started working with a new client and his ads account. You need to check all current settings for deficiencies and suggest options for improving them;
- You’ve never done an account audit or did, but a very long time ago. You need to do an audit on a regular basis in order to fix configuration errors in time and improve performance.
Step 1. Link to Google Analytics
First of all, you need to determine whether the connection with Google Analytics is configured. To do this, go to “Tools and settings”, then – to “Linked accounts”.
A page with options opens for connecting with various Google products and others. Choose Google Analytics – Details.
In the table that appears, find the resource you need and check the Status column. If the accounts are connected, then the status will be “Not linked”.
If the resource is not connected, find it and click on “LINK”.
Step 2. Conversions import
When conducting an Ads audit, it’s advisable to fully understand which conversions are being monitored and to verify their performance. Indeed, one of the most important elements of a successful Ads account is conversion tracking.
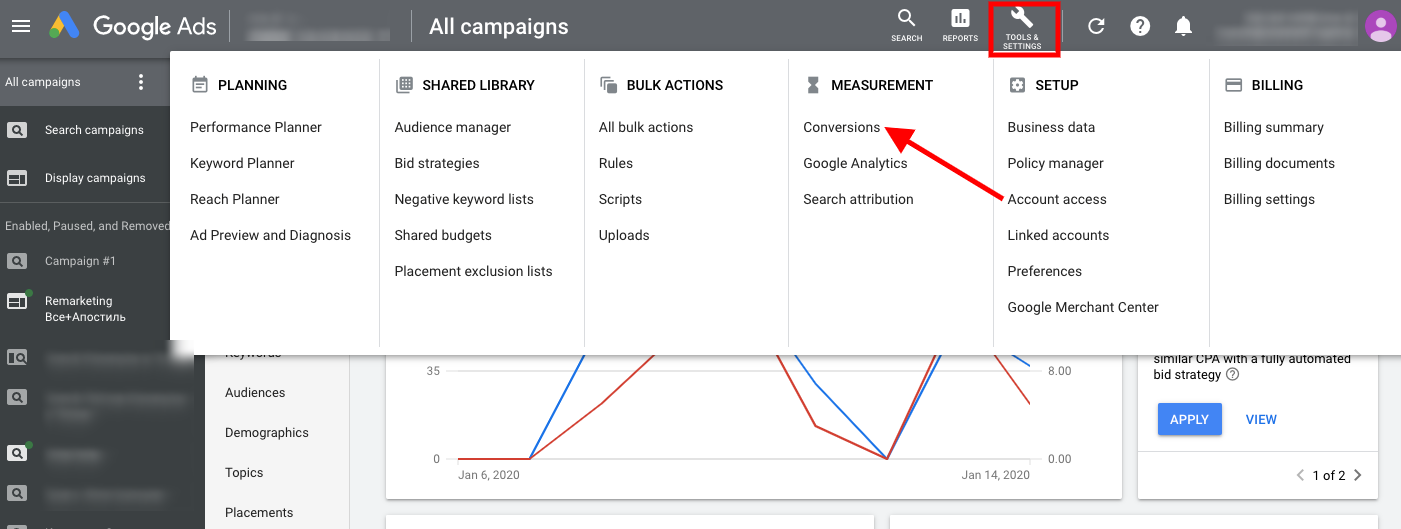
In your accounts, conversion tracking is often configured incorrectly or not configured at all. To check and set up conversion tracking, go to “Tools & Settings” – “Conversions”.
Step 3. Ads campaign settings
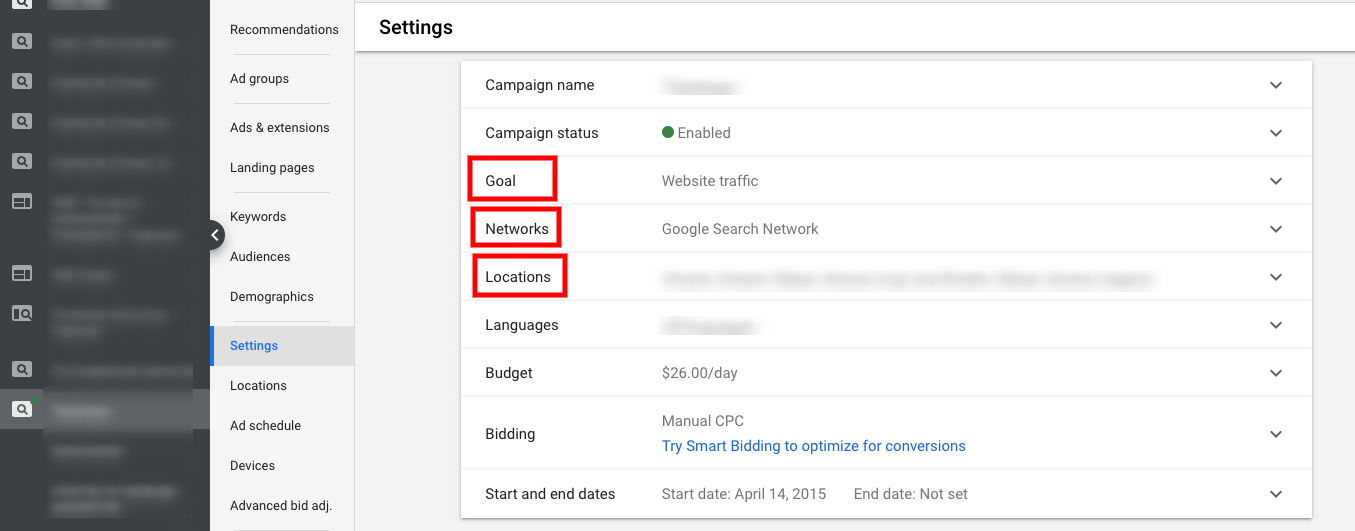
In each active advertising campaign, you need to check its settings. To do this, go to the advertising campaign then click on ‘Settings’.
I recommend paying special attention to the following three points:
- Goal – it should reflect the main goal of this ads campaign;
- Networks – one network should be selected that is suitable for this ads campaign;
- Locations – any advertising campaign should be aimed at specific geo. Check if you selected it correctly.
Step 4 . Structure of ads account
Organizing ad groups is one of the easiest methods to simplify the use of ads account. Breakdown of ad groups can significantly improve quality scores. The simplified account structure shows what you get in each ad group, without having to click and view a large number of keywords.
Try to ensure that one ad group contains no more than 10 keywords of the same name and meaning. Also, remember that it is best for one keyword to be in three match types (exact, phrase and broad type modifier).
Step 5. Negative keywords
Negative keywords are needed in order not to show ads for inappropriate requests. This is very important for a search campaign. If you ignore negative keywords, then, firstly, the budget will go to inappropriate transitions, and secondly, the CTR will decrease.
Negative keywords can be added at the account, campaign or ads group level.
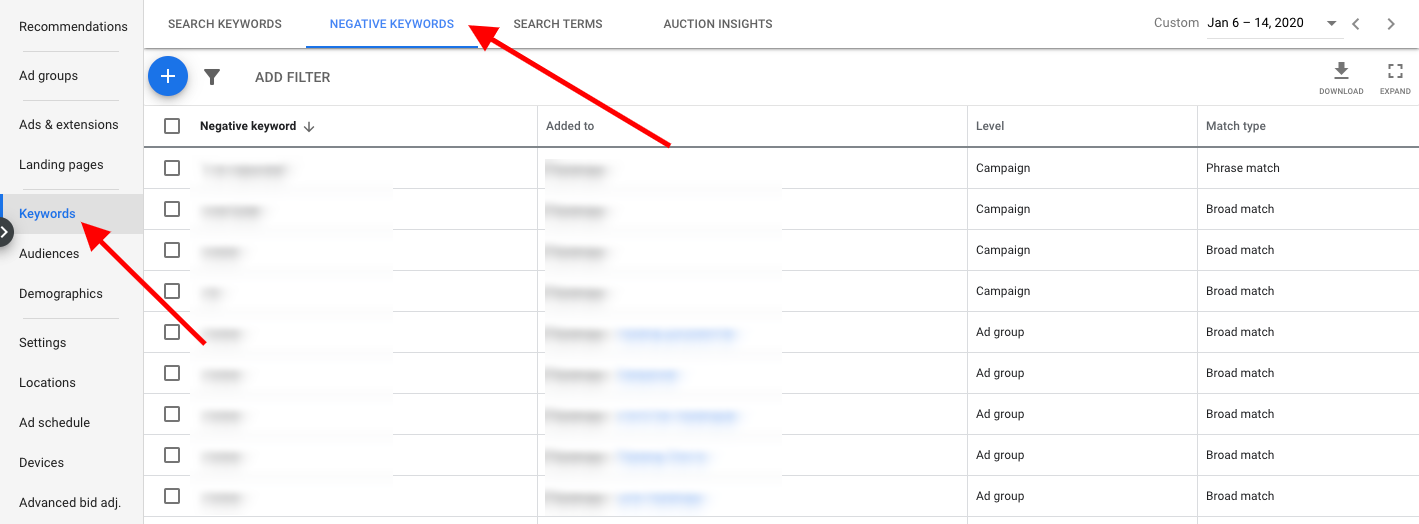
To check an ads campaign for negative keywords, go to the ‘Keywords’ – then to ‘Negative Keywords’ section.
Enrich your negative keywords list weekly by checking the search terms in which your ads are shown. If an ad is shown on an unnecessary request for you – feel free to add it to the negative keywords.
Step 6. Search terms
Search terms are terms that make it possible for users to see your ad and go to the site through it.
Find the search query report in the Keywords – Search terms section.
Here you can filter and sort data by indicators such as conversions, CTR, clicks, and others. They will show popular search terms for which you get traffic and results.
Step 7. Extensions
Google Ads have a number of extensions that should be applied to search campaigns. With their help, you can increase the ranking of ads, which will help to occupy more profitable positions at lower costs.
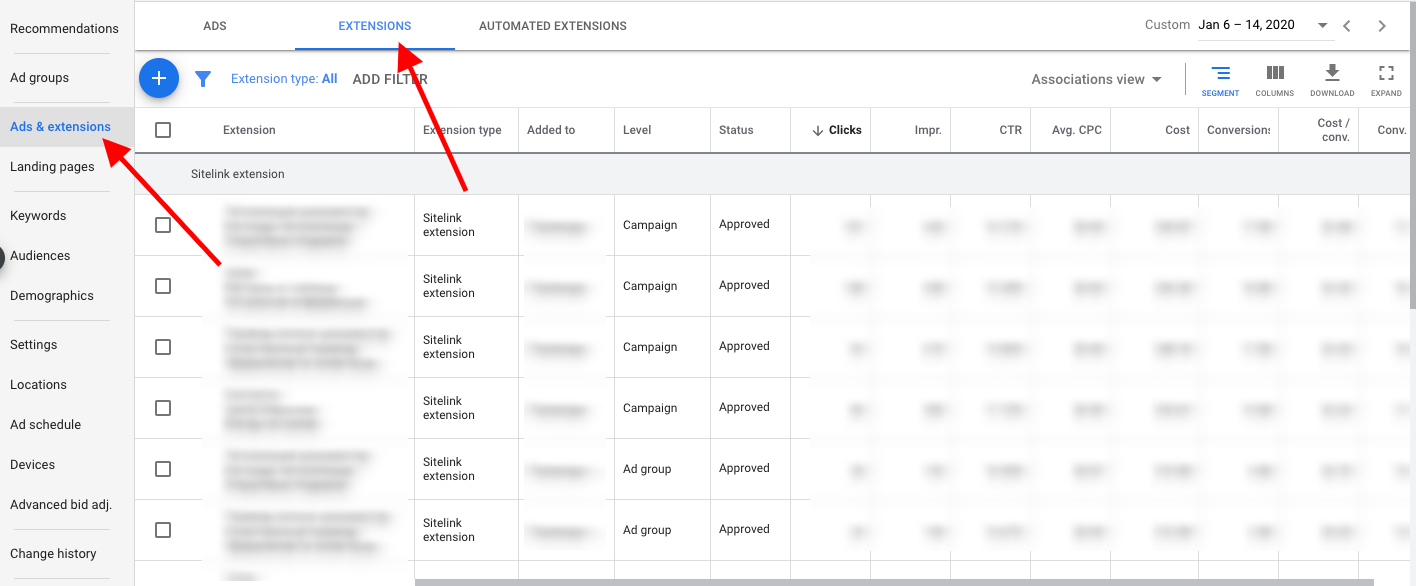
You can check which extensions are added by going to the ‘Ads & Extensions’ – ‘Extensions’ tab on the top panel.
Step 8. Quality Score
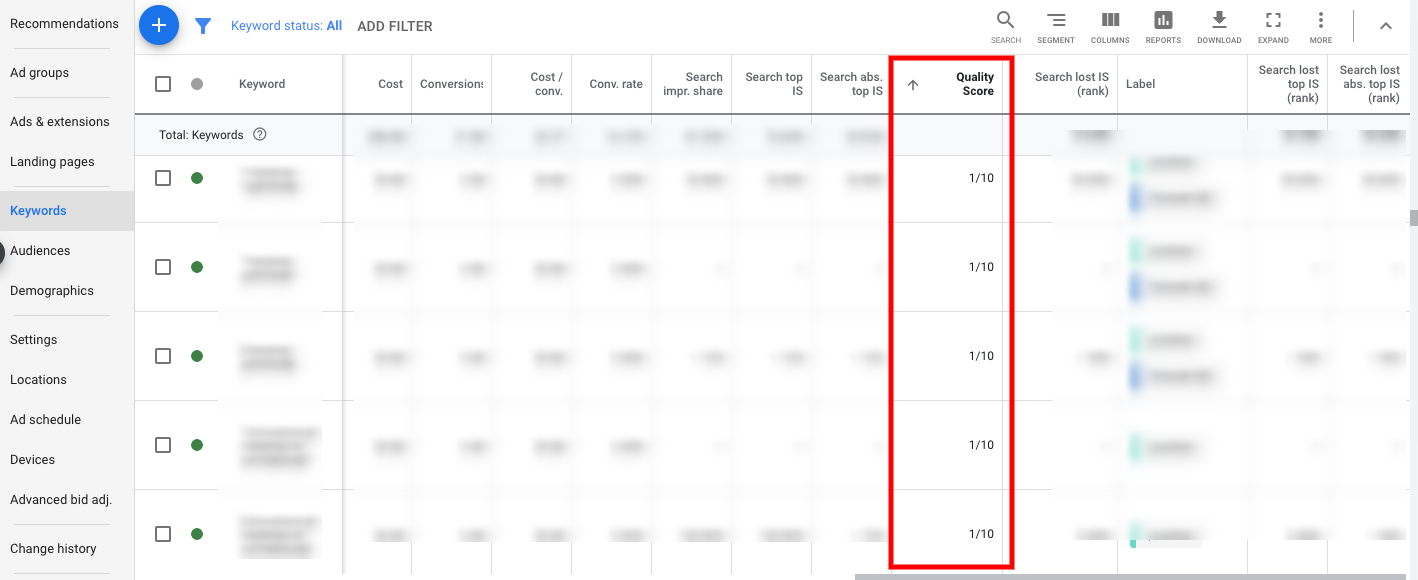
The Quality Score can take values from 1 to 10, where 10 is the highest score that you need to strive for. The higher the Quality Score is, the more often and in better positions your ads are displayed, and usually, the cost of a click on such ads is lower. This also works in the opposite direction – the lower the Quality Score is, the more expensive clicks on ads can be, and the less often your ads will win the auction and be shown to the user.
To see your Quality Score, add columns at the Keyword level.
Step 9. Landing page experience
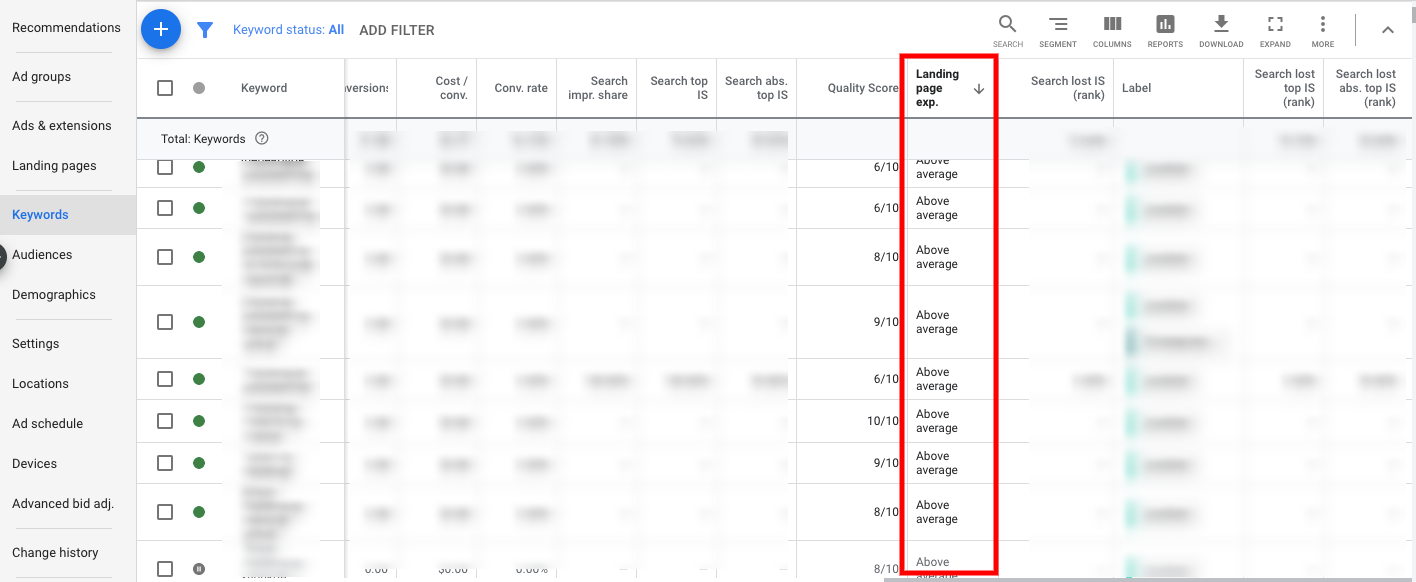
In the Keywords section, add the ‘Landing page experience’ column.
If the landing page is bad, optimize it. If your account has a Women’s Swimwear ads group, you should direct users to this transition to the landing page where women’s swimsuits are presented. The ad should not lead to your homepage or general store links. When conducting an audit, ensure that ads lead users to relevant pages.
Step 10. Remarketing
The absence of a remarketing campaign can mean the loss of interested customers. If you don’t have a remarketing campaign, create audiences faster and return users to the site.
For an active remarketing campaign, pay attention to what results it brings. After all, remarketing also needs to be optimized. Check your ad placement. Go to the campaign, then go to ‘Placements’ – ‘Where ads showed’.
The report can have many mobile applications and YouTube-channels, which are basically just a click fraud. Add inappropriate sites to the exclusions for the entire ads campaigns or groups.


